The 10th Royal Hussars in the Battle for France, 1940
By Steven Broomfield (Museum Volunteer)
While much has been written – rightly – to commemorate the 80th anniversary of the miracle of Dunkirk, less has been heard about the British units who remained in France, trying to bolster French resistance to the German forces overwhelming their country. One of our predecessor regiments, the 10th Royal Hussars, was amongst them.
The Tenth had returned from India in 1936, leaving their horses behind, and begun the slow and painful process of mechanisation. A few obsolete tanks and elderly lorries arrived in 1937, and by the outbreak of war in September 1939 the regiment was equipped with tanks nowhere near able to match the enemy they were to meet in France. When the British Expeditionary Force went to France in 1939 the 1st Armoured Division, of which the Tenth were a part, was not ready to deploy so remained in England to train and re-equip with more modern vehicles.
By early 1940 there had been some improvements. The regiment was equipped with light tanks (thinly armoured and armed with machine guns) and cruiser tanks (the A13, better armoured and with a 2 pounder gun), but only enough A13s existed to equip a third of the regiment. By April, 1940, they were located at Wimborne in Dorset. In early May, it was announced that the division would move to France, initially to continue training and preparing for battle.
However, fate intervened – before they moved, the German offensive began. By the time the regiment sailed from Southampton at 1600 hours on 21st May (on the ships ‘Vienna’ and ‘Amsterdam’), a crisis had already arisen. Bound for Le Havre, orders were received in mid-Channel to divert to Cherbourg. The Germans were already near the coast: any thought of further training had gone – the regiment was going into action!
As a sign of the chaos of the time, the guns for the A13s were not mounted in the tanks. They were lashed to the sides, and the first job for the crews was to mount them and calibrate them. An ominous beginning to the campaign was helping RAF men to load two long trailers full of aeroplane engines for return to the UK. Evacuation was already beginning.
A series of orders and counter-orders set the scene. The Division had lost all its infantry and one tank regiment, sent to defend Calais. Field artillery had been left behind. There was no air support. Communications with BEF Headquarters had been lost when the Germans crossed the River Somme.
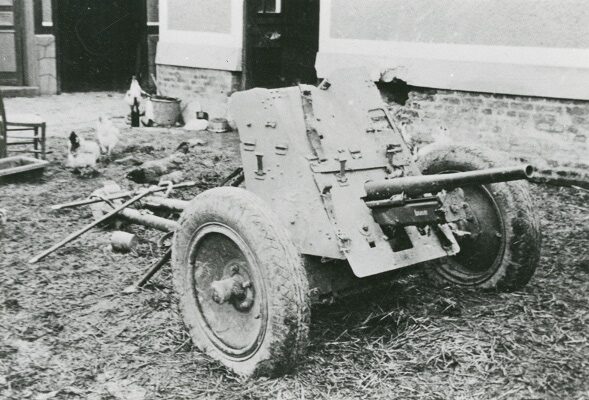
Moving forward to meet the Germans, the troops were horrified to pass the wreckage of refugee convoys, machine gunned by German aircraft – the bodies of civilians ‘… infuriated the men, who pressed on to seek some measure of retaliation against the enemy’. Passing to the command of the French, on 27th May the Division was ordered to attack a German bridgehead across the Somme. French reconnaissance claimed the Germans were ‘… inferior troops equipped only with light anti-tank weapons’.
The attack, at Huppy, South West of Abbeville, went badly. It was due to start at 0500 and the Tenth crossed the start line alone. The only radio in contact with higher command had failed, and a despatch rider had been killed; the message he carried was an order to postpone the advance until 0600 as French infantry were not ready. The other British armoured unit involved (the Queen’s Bays) had received the message – the Tenth advanced unsupported. Additionally, French reconnaissance was incorrect: Huppy was alive with German soldiers and extremely effective anti-tank guns. Tanks attacking anti-tank guns while unsupported by artillery or infantry has only one outcome.

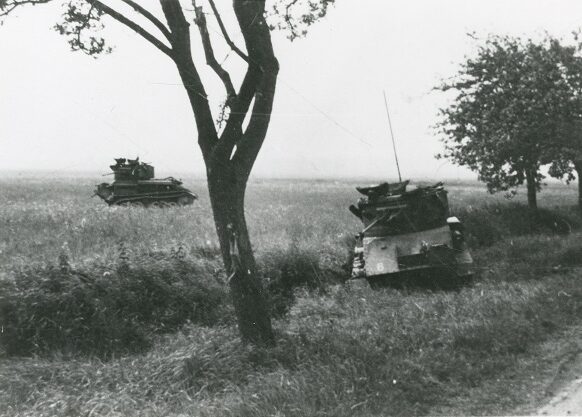
Twelve A13s and eighteen light tanks went into action. Seven A13s and thirteen light tanks were lost, together with three officers and six men killed, with two officers and nine men taken prisoner. The Bays, who arrived at 0600, suffered similar losses, and the remaining tanks of both regiments were amalgamated into one squadron. The Tenth withdrew to the west; on the following day, the 51st (Highland) Division, serving with a French Army, counter-attacked and drove back the German bridgehead.
From then the story is a tale of one retirement followed by another. On 31st May the regiment’s five remaining tanks were sent off by train, never to be seen again. The regiment was converted into a lorried infantry unit, armed with Bren guns and anti-tank rifles. On 5th June they were in action to the east of Rouen and on the 7th, two A13s and 6 light tanks were received.
To show the confusion of war, on the 8th June both the Tenth and the Bays were retiring across the Seine when they were stopped at a barrier blocking the only available bridge. The French officer in charge refused to raise the barrier, and threatened to order his artillery nearby to fire on the British if they tried. The commanding officers of the two British regiments composed a plan to force the crossing, and were just about to implement it … when the barrier was cleared!Twelve A13s and eighteen light tanks went into action. Seven A13s and thirteen light tanks were lost, together with three officers and six men killed, with two officers and nine men taken prisoner. The Bays, who arrived at 0600, suffered similar losses, and the remaining tanks of both regiments were amalgamated into one squadron. The Tenth withdrew to the west; on the following day, the 51st (Highland) Division, serving with a French Army, counter-attacked and drove back the German bridgehead.
From then the story is a tale of one retirement followed by another. On 31st May the regiment’s five remaining tanks were sent off by train, never to be seen again. The regiment was converted into a lorried infantry unit, armed with Bren guns and anti-tank rifles. On 5th June they were in action to the east of Rouen and on the 7th, two A13s and 6 light tanks were received.
To show the confusion of war, on the 8th June both the Tenth and the Bays were retiring across the Seine when they were stopped at a barrier blocking the only available bridge. The French officer in charge refused to raise the barrier, and threatened to order his artillery nearby to fire on the British if they tried. The commanding officers of the two British regiments composed a plan to force the crossing, and were just about to implement it … when the barrier was cleared!
Despite Dunkirk having fallen, Paris being declared an Open City, and the Germans threatening to cut off retreat to the coast for evacuation, hope still existed of re-equipment and a stand being made. It was not to be. A ‘Second BEF’ was landed, comprising the 52nd (Lowland) and 1st Canadian Divisions but there was no chance of the 1st Armoured Division joining them in the Cherbourg Peninsula. It was decided the port of Brest, in Brittany, would be the final stop … and evacuation to the UK.
On the 16th June, the remaining men of the Tenth, minus all their vehicles, boarded the ‘Manxman’. German bombers had laid mines in the channel out to sea and there were no minesweepers available. Fortunately, ‘… the skipper of a rusty old cargo vessel’ had watched the mines being dropped and felt able to lead the ‘Manxman’ to sea ‘…with a fair chance of missing the mines’. Fortunately, he was right, and 0830 the ‘Manxman’ docked in Plymouth.
Four officers and seventeen men of the regiment had been killed. Three officers and thirty two men had been captured. Two Military Crosses, four Distinguished Conduct Medals and one Military Medal had been won. All tanks and vehicles had been lost. The spirit of the regiment lived on.